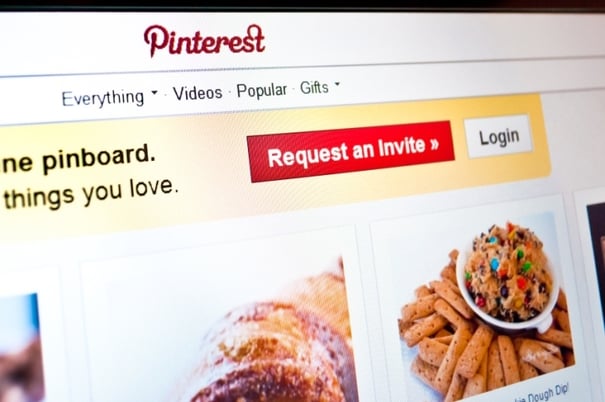
Pinterest was first launched back in March 2010 and since then the website’s popularity has increased massively. It has grown so much that a study released in July 2013 by a French Social Media agency revealed the website had 70 million users worldwide!

This number is continuing to increase and the site is now one of the most popular Social Media websites online today. However, how can you use Pinterest as a business owner to increase the traffic to your website and ultimately get more leads and enquiries? Continue reading to find out...
1) Creating an account
If you already have a Pinterest account set up then go straight to point 2. If not then the first thing you need to do, before you can start getting more website traffic from Pinterest, is to create an account. To do this, visit the home page, enter your email address and desired password then click on the sign up button. When you get to the next page there should be an option that says continue as a business, as below...
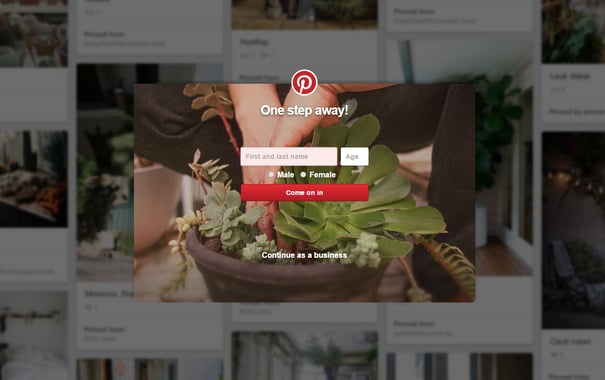
Once you have got past this step, fill in all of the required information. This should be your email, password, business name, business type and your website. Your website address is an optional field to fill out but it should be filled in and will be beneficial. After this it will ask you to follow some boards, just follow a few you are interested in then continue. You should get to the screen below...
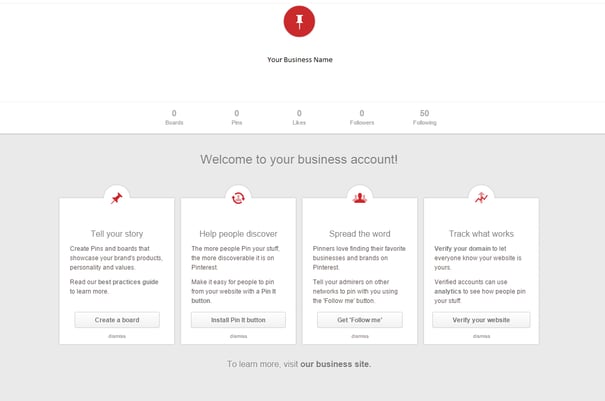
Once you have got to this screen you need to follow the steps to verify your email address. Once this has been verified, I would recommend verifying your website, you can do this by clicking the link on the right hand site (shown above). This will give you a meta tag to add to the section of your website. If you know how to do this in your content management system then great, if not just forward it onto your hosting company and they should be able to add it for you.
Verified accounts show up when people search Pinterest and they let you utilise Pinterest analytics. For information on how to set up the analytics for Pinterest, read this article - http://www.smartinsights.com/social-media-marketing/social-media-platforms/how-to-setup-the-new-pinterest-analytics/
After you have completed the above steps you need to look at optimising your Pinterest profile. To do this add a short description about your business, be sure to include your main services in this as well as your website URL and contact address. Finally, you need to add a profile image. This can be something as simple as your company logo. As soon as you have completed these steps you can move on to the following ones. For more information on setting up your account read this article: A Beginners Guide - How To Create A Pinterest Page For Your Business
2) Creating boards and adding pins
Creating new boards is something you will do regularly on Pinterest. Whenever you upload a pin you can either add it to an existing board you have created or set up a new one. With each board you create it is a good idea to fill in the board description with a few brief details on what the pins are going to be of. I would start by setting up different boards for your different products and services.
Once these have been set up you can start adding pins. Be as active as you can be with this, and if you can add a new pin to a board every day that's great. The pins can be interesting photographs, quotes, products, services, your team, infographics and much more! It is worth testing different colours for your pins to see which get more interaction. For example, an infographic on a blue background may perform better than one on a red background. With the pins you post, if there is an opportunity to link back to your site in the pin description, so long as it is relevant then do so. This is where you will generate the additional traffic from. However, be careful not to make these mistakes – 3 Things You Should Never Do When Pinning On Pinterest
3) Share, like and re-pin other users pins
To start getting more interaction on your pins and more visits to your website from pin descriptions and your profile, you need to interact with others. The best way to do this is by sharing, liking, repinning and commenting on other users pins. You can find pins to do this with by using the search function on Pinterest and searching for something related to your business industry or just something you are interested in. Do this as often as you can.
4) Follow users and boards in similar niches
This is similar to the above step. Once you have repinned, commented and liked other users pins and boards you should start following other people as well. The more people you follow the more will follow you back and therefore the more people will see your pins. This means you will start to generate more traffic to your website. Again, actively follow users who are like-minded on a regular basis.
5) Use promoted pins
Promoted pins is a new feature on Pinterest that allows you to pay in order to get your desired pin seen by more people. At this moment in time the feature is very basic but there are plans in place to expand the features by releasing new ad formats and targeting parameters. You need to sign up separately for Promoted Pins and you can do this by visiting https://ads.pinterest.com and register. You must sign up via a business account. For more information on promoted pins, read this article - http://www.semrush.com/blog/pinterest-spotlight-need-know-promoted-pins/
If you utilise a number of the above tactics you will start to generate more traffic to your website from Pinterest referrals. This will hopefully, in turn generate more leads, enquiries and ultimately sales.